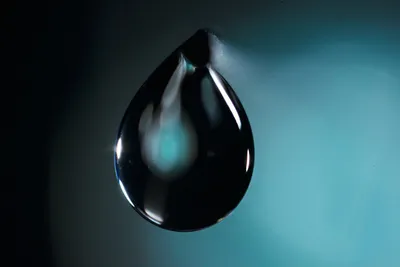
Macro Lenses for Filmmaking: Shooting Details and Inserts
Image source: Macro Cinematography — Brendan McGinty
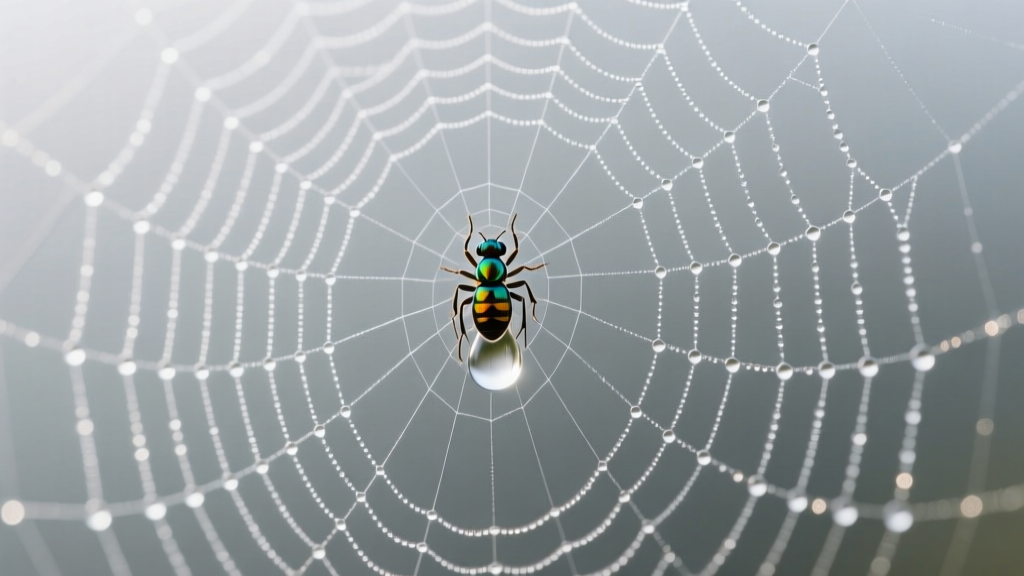
Image source: Fun With Macro Photography: See the World at 1:1 and Beyond

Image source: Introduction to Macrophotography - Lenz Lim Photography
Macro lenses for filmmaking: details and inserts
A macro lens turns small details into readable story beats: a finger turning a key, a watch mechanism catching light, or a drop forming on glass. For most inserts, the goal is not the highest possible magnification; it is to make the important detail clear while preserving enough context, focus, and movement to fit the scene.
Choose the shot first
A true 1:1 macro lens projects a subject onto the sensor at actual size: a 10 mm object makes a roughly 10 mm image. But “macro” is also used more loosely for close-ups, and many useful inserts need much less than 1:1. Magnification determines how much of the subject fills the frame; sensor size determines how that magnification reads in the final image. 1, 2
Start by deciding what the audience must see. A label or engraved name needs a reliably sharp surface. A bead of water can use a narrow plane of focus to reveal its shape gradually. If the detail is part of an action—say, a hand inserting a key—leave enough room for the movement and a clear point of focus. That decision matters more than simply choosing the closest focus the lens permits.
Macro also changes the feel of scale. At close distances, the frame can feel abstract, almost miniature, even when the subject is ordinary. That can be useful for product work, beauty shots, insects, food, or mechanical details, but it can also make a scene feel detached if the insert does not match the surrounding coverage. The lens is only part of the decision; the shot’s job in the edit comes first.
Pick the right tool
| Setup | Best use | Main trade-off |
|---|---|---|
| Standard macro lens | Controlled inserts of objects, hands, textures, and product details | High magnification makes focus, lighting, and camera movement demanding. 1, 3 |
| Longer macro lens | Details that need space for lights or where the camera should stay back | At the same magnification, it generally gives more working distance and a less immersive viewpoint. 1 |
| Shorter or wide macro | Close details that should still feel connected to their surroundings | The front of the lens may sit very near the subject and obstruct lighting. 1, 3 |
| Diopter or extension tube | Occasional close-focus shots with a lens already in the kit | Both allow closer focus; an extension tube goes behind the lens, while a diopter goes in front. Test the resulting focus range and image quality. 3 |
| Probe lens | Low-angle moves into a small set or a space a camera body cannot enter | The narrow front helps access, but probe setups can be slow and light-hungry. 3, 2 |
Check working distance, not just the advertised minimum focus distance. Working distance is the gap from the front of the lens to the subject; minimum focus distance is generally measured from the camera’s sensor. That gap determines whether a light can fit, whether the lens throws a shadow, and whether hands, props, or motion can be staged safely. 1
Working distance is often the difference between a usable macro setup and an awkward one. A longer macro lens may keep the camera farther from the subject, which can make room for small fixtures, flags, or even practical interaction with the object. A shorter macro can be ideal for intimate perspective, but the front element may crowd the set and force lighting from above or from the sides. For glass, metal, and polished surfaces, that extra breathing room is often the real advantage.
Depth of field, focus breathing, and movement
Depth of field becomes extremely thin as magnification rises. Even when the lens is stopped down, only a small slice of the subject may stay sharp, especially if the subject is not flat. A watch face, a printed label, and a coin all behave differently: the flatter the subject plane, the easier it is to keep detail readable across the frame.
That thin focus plane makes focus breathing and camera movement more noticeable. When a lens changes field of view during a focus pull, the frame can appear to “push” or “pull” even if the camera stays locked off. In macro work, that effect is often more visible because the subject fills so much of the frame. If the goal is a subtle insert, a lens with controlled breathing and a stable support setup usually reads better than one with a dramatic focus shift.
Small subject movement also matters more than usual. A cable flexing, a liquid surface rippling, or a hand drifting a few millimeters can push the critical detail out of focus. For repeatable action, focus stacking is rarely practical for moving inserts, so the safer approach is usually to simplify the blocking and keep the important plane as predictable as possible.
Make the insert shootable
- Secure the setup. Support the camera and subject independently, then check the frame after anyone touches the set. At high magnification, tiny movements become visible. 2
- Place the critical detail in focus. Depth of field becomes very thin as magnification rises. Aligning a flat label or dial with the focus plane can help more than stopping down alone. 1
- Add and shape light. A smaller aperture can recover some depth of field, but close-focus work can also reduce effective light transmission; stopping down too far trades sharpness for diffraction. Use controlled light and test the aperture on the actual subject. 1, 3
- Rehearse the movement. At high magnification, a small move can change both framing and focus. For a precise focus transition, locking lens focus and moving the camera on a macro rail can be easier to repeat than turning the focus ring. 2
- Inspect the take at full size. Check the intended focal point, dust, reflections, and whether movement remains smooth. If shooting high frame rates under LEDs, test for flicker at the final frame rate and shutter setting. 2
Lighting is usually the hardest part of a macro insert. The lens can get so close that a large soft source no longer fits, and reflections from the front element or the subject can dominate the frame. Small sources, flagged hard light, and carefully placed bounce cards often work better than trying to force a large diffuser into a cramped working distance. For transparent subjects like droplets or glass edges, backlight and edge light can define shape more clearly than front light.
A practical macro setup often starts with the light, not the lens. If the subject is reflective, the angle of incidence matters as much as exposure: a tiny shift in lamp position can remove a hot spot or turn a dull surface into something readable. For liquids, a dark background with a controlled rim or back edge can reveal the contour of the droplet more effectively than broad frontal illumination.
Extension tubes and diopters
Extension tubes and diopters are useful when a full macro lens is unavailable or unnecessary.
- Extension tubes move the lens farther from the sensor, allowing closer focus. They do not add glass, so they preserve the lens’s optical character better than many close-up adapters, but they reduce infinity focus and can cost some light.
- Diopters act like close-up magnifying filters placed in front of the lens. They can be fast to mount and useful on a normal or telephoto lens, but quality varies, and strong diopters can soften edges or introduce color fringing.
Both tools are best treated as problem-solvers, not replacements for a dedicated macro lens in every situation. For a quick insert of a ring box, a printed patch, or a tabletop detail, either can be enough if the image holds up under close inspection.
Common mistakes
- Choosing magnification before shot design. A 1:1 lens is not automatically better than a looser close-up if the story needs more context.
- Ignoring working distance. A lens may focus close enough on paper but still fail once lights, flags, or hands enter the setup.
- Stopping down blindly. More depth of field is helpful, but too much stop-down can reduce sharpness through diffraction and demand more light.
- Forgetting background control. At macro distances, distracting texture or stray highlights behind the subject can overwhelm the insert.
- Letting the camera move too much. Even a mild handheld drift can read as a major shift at high magnification.
When macro is the wrong choice
A macro lens is not always the best tool for details. If the subject needs to be shown in motion with more spatial context, a close-focus standard lens or a longer lens with a close-in frame may be easier to integrate. If the action requires the camera to travel through a miniature space, a probe lens can be more appropriate than a conventional macro. If the scene needs the audience to feel the environment rather than the object, too much magnification can flatten the story.
For a key entering a lock, for example, one insert may be wide enough to show the key meeting the keyway, then a tighter shot of the turning mechanism if that detail matters to the story. The tighter shot may be more striking, but the first tells the viewer what happened.
A good macro insert earns its place in the edit: it directs attention to a meaningful detail, stays legible for the duration of the action, and matches the surrounding scene’s light and visual rhythm.