AI Upscaling and Restoration of Film Footage: A Practical Guide for Filmmakers
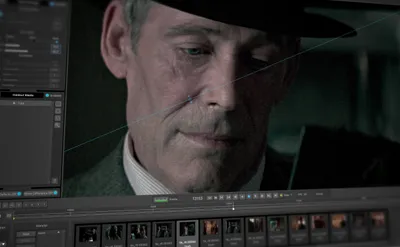
Image source: Remastering Archive Footage for Redistribution - PFClean
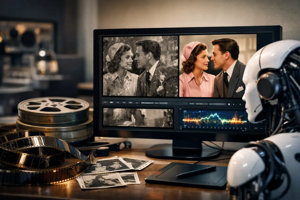
Image source: AI Trends in Film Restoration That Matter

Image source: Restore Old VHS & DVD Footage with AI
AI upscaling and restoration of film footage
AI can make film footage easier to watch on modern displays, but a sharper image is not necessarily a more faithful one. Upscaling estimates a larger image; restoration addresses damage such as dirt, scratches, fading, or instability. Neither can reliably recover a detail that the source never recorded. 1
The practical rule is simple: treat AI as a correction tool, not a truth machine. In film work, the goal is usually to preserve what was photographed and what was historically present on the element, while removing damage introduced later by age, duplication, or scanning.
What AI can do
An AI upscaler uses patterns learned from other images to estimate edges and textures at a higher resolution. That can improve the appearance of a soft or low-resolution scan, but a plausible-looking face, sign, or fabric pattern is not proof that those details were present in the film. Models can also make textures shimmer between frames, smooth faces unnaturally, or mistake film grain for a defect. Judge the result in motion, not from a single impressive still. 1, 2
AI-assisted cleanup can help with repetitive defects, but it works best as one supervised step in a broader restoration. A scratched frame, for example, may need targeted repair before upscaling so the scratch is not enlarged or misread as part of the picture. 1, 2
In practice, AI is strongest when the source is already legible and the task is modest: lifting a 1080p scan for a 4K delivery, reducing minor compression loss, cleaning consistent speckling, or stabilizing a damaged shot without changing the underlying image structure. It is weakest when the source is severely under-resolved, heavily blurred, or missing large areas of picture information. At that point, the software is not restoring detail so much as inventing a convincing approximation.
A careful workflow
flowchart LR A["Choose and inspect source"] --> B["Scan and preserve raw files"] B --> C["Identify damage and original characteristics"] C --> D["Stabilize and repair selectively"] D --> E["Test restrained upscale on difficult shots"] E --> F["Review motion, grain, faces, and color"] F --> G["Export master and document changes"]- Set the goal. Decide whether you need a faithful archival restoration or a more freely enhanced viewing copy. That choice governs how much inferred detail is acceptable. 3
- Start with the best appropriate element. Inspect available film elements and reference prints, then make a high-quality scan. Preserve the untouched scan before processing; it is the record you can return to if a treatment proves wrong. The sharpest negative is not always the best guide to how a film originally appeared in cinemas. 3
- Separate damage from character. Remove later dirt or scratches selectively, but do not automatically erase original grain, camera movement, optical effects, or production marks. Stabilization should correct unwanted movement introduced by damage or scanning, not intentional camera motion. 3
- Run a short test. Include faces, titles, grainy shadows, movement, and transitions. Compare restrained AI settings with the untreated source at a matched viewing size, then watch the sequence at normal speed and inspect troublesome frames. 1
- Finish and retain the evidence. Grade against reliable historical references where possible, check the actual delivery encode, and keep the raw scan, settings, intermediate versions, and a record of interventions. 1, 3
A good test clip is usually more revealing than a long pass through an entire reel. Include the hardest material: soft dialogue coverage, fast pans, smoke, low-light interiors, optical dissolves, and any section with repeated scratches or weave. If the upscale behaves well there, it is more likely to hold together across the rest of the film.
Choosing the right source
Restoration quality begins before any AI pass. A clean 2K scan from a first-generation element can outperform a noisy 4K scan from a battered duplicate. Film grain, focus falloff, lens softness, optical printing, and camera stock all belong to the image; damage does not. That means the scanner should capture as much real information as possible without exaggerating scratches, gate weave, or dust.
When multiple elements exist, compare them shot by shot. A release print may carry the intended timing or editorial shape, while an older negative may hold better detail in some sections. Color reversal material, black-and-white negatives, interpositives, and release prints each produce different textures and defect patterns, so the “best” source depends on the restoration goal, not on resolution alone.
Grain, texture, and temporal consistency
Film grain is one of the most common casualties of overzealous AI work. Grain is part of the photographic texture, and it moves differently from dirt or noise. If the model cleans grain too aggressively, the image can take on a waxy, plastic look. If it guesses too much texture, the grain may crawl, pulse, or appear to reorganize from frame to frame.
Temporal consistency is the practical test that matters most. A single frame can look impressive even when the sequence flickers, outlines breathe, or facial pores come and go. The safest approach is to preserve stable structure first and add only the minimum treatment needed to make the image readable. In many restorations, leaving some grain in place produces a more credible result than replacing it with synthetic texture.
Common artifacts to watch for
AI restoration usually fails in recognizable ways:
- Hallucinated detail: text, fabric weave, eyelashes, or jewelry that look precise but were never recorded.
- Motion wobble: edges and faces subtly shifting shape from frame to frame.
- Texture boiling: grain or fine detail that appears to shimmer or crawl.
- Plastic skin: faces and skin tones over-smoothed until pores and micro-contrast disappear.
- Edge ringing: outlines that become unnaturally hard after sharpening or upscaling.
- Over-cleaning: dust and scratches disappear, but so do useful details such as pores, hair, and fine set texture.
These problems are easiest to spot on faces, typography, and high-contrast edges. A title card is often a better diagnostic than a scenic shot because any invented letterform is immediately visible.
Restoration ethics and deliverables
For archival work, the aim is to repair deterioration without quietly redesigning the film. The International Federation of Film Archives advises preserving original grain, aspect ratio, frame rate, editing, and historically meaningful marks; its guidelines reject artificial sharpening or smoothing, synthetic grain replacement, and newly interpolated frames as restoration practices. A creative version can make different choices, but it should be identified as an enhancement or derivative rather than presented as an untouched historical restoration. 3
That distinction matters in deliverables. A preservation master should keep the scanned source, the processing log, and a version history that makes it possible to trace every intervention. A viewing master can be more aggressive if the audience expects a cleaned-up presentation, but the result should still remain stable, legible, and consistent from shot to shot.
For home movies or a contemporary production, a modest upscale may be worthwhile even when perfect historical fidelity is not the goal. The practical test remains the same: does the footage look better while staying stable and recognizable throughout the shot? If faces change, text becomes invented, or fine detail flickers, reduce the treatment or use a simpler upscale. 1
Practical settings logic
The best AI settings are usually the least dramatic ones that solve the actual problem. Mild scaling often preserves more believable texture than a maximum-strength pass. Sharpening should be approached carefully, because AI upscaling already creates the illusion of added detail; extra sharpening can turn soft edges into halos and make restored footage look processed.
A reliable order of operations is usually:
- stabilize only if the scan has mechanical weave or damage-induced movement;
- repair obvious defects selectively;
- upscale with restrained settings;
- review at real playback speed;
- apply grading last, after the image structure is settled.
That order keeps the grade from hiding artifacts and prevents later processing from magnifying problems created earlier in the chain.
A simple rule of thumb
If the treatment makes a shot easier to read without changing its identity, it is probably serving the footage. If it creates new textures, new letters, new wrinkles, or new motion, it has crossed from restoration into invention.