Mastering the Three-Point Lighting Setup: A Must-Know Technique for Filmmakers
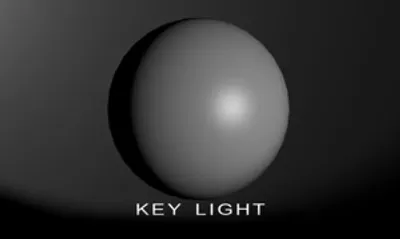
Image source: Three Point Lighting: The basic setup
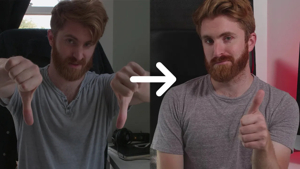
Image source: YouTube Lighting Setup for Beginners: 3 Point Lighting Tutorial
Three-point lighting is the foundational lighting technique for film and video, using three separate light sources to create a balanced, three-dimensional image: the key light, fill light, and back light. 1, 2 In practice, it is less a rigid formula than a flexible starting point for shaping exposure, contrast, and separation on faces and products alike.
The Three Lights Explained
| Light | Purpose | Position | Intensity & Quality |
|---|---|---|---|
| Key Light | Main light source; defines the subject and creates modeling on the face 1, 3 | 45° angle from camera, slightly above head height, angled down 4, 2 | Brightest light; can be hard or soft 2, 5 |
| Fill Light | Softens shadows created by the key light; “peacemaker” of the setup 3, 2 | Opposite side of camera from key, near the lens axis (to avoid double shadows) 1, 6 | Softer and less intense than key; typically 1/3 the intensity (3:1 ratio) 1, 2 |
| Back Light (Rim Light) | Separates subject from background; adds depth and a glow on shoulders/edges 2, 3 | Behind subject, opposite the key light, above head height, angled down 1, 2 | Smaller light source; creates subtle rim/edge light 1, 3 |
The three lights work together because each one solves a different visual problem. The key light gives the subject a readable shape. The fill light keeps shadow detail from collapsing into black. The back light prevents the subject from blending into a dark or busy background.
How the Classic Setup Is Built
A practical three-point arrangement starts with the key, because it establishes the direction of light and shadow. Once the key is placed, the fill is adjusted only enough to open the shadows without flattening the face completely. The back light is then set to create a thin highlight along the hair, shoulders, or cheek line.
A useful rule is to think in terms of ratios rather than equal brightness. A 3:1 key-to-fill ratio is a common starting point because it preserves shape while keeping the image clean and flattering. Harder ratios, with less fill, create mood and contrast. Softer ratios create a more neutral commercial look.
Key Placement Tips
- Key light: Position between 15–45° to the side of the camera; for interviews, place the interviewer between the camera and key light 5
- Fill light: Place close to the camera-to-subject axis to avoid creating a second set of shadows; use a diffuser (spun material or scrim) to soften it 6, 1
- Back light: Position anywhere behind the subject as long as it’s out of frame; should be above head height 2, 1
Small changes in height and angle matter. Raising the key even a little can sculpt cheekbones and nose shadows. Lowering it can make the face look flat or unnatural. Moving the fill farther off axis can create unwanted shadow direction, which defeats its purpose. The back light should skim the edge of the subject rather than blast the lens or illuminate the background too strongly.
Step-by-Step Setup
- Place the subject first. The relationship between the subject and background determines how much separation is needed.
- Set the key light. Aim for the most flattering shape on the face or object, usually from one side and slightly above.
- Add fill. Lower the intensity until the shadows feel controlled but not erased.
- Add the back light. Adjust it until a subtle rim appears on the far side of the head or shoulders.
- Check the background. If the background is too bright or too close in value to the subject, reduce spill or increase separation.
- Fine-tune contrast. A face should still have dimensional shadow on the far side; if both sides read equally, the setup has become too flat.
For interviews, the classic arrangement usually places the key about 30–45° off camera, the fill near the lens, and the back light behind the talent on the shadow side. For product shots, the same logic applies, but the back light may become a highlight kicker on edges, glass, or metallic surfaces rather than a hair light.
Hard Light vs. Soft Light
Three-point lighting works with either hard or soft sources, but the look changes significantly.
- Hard key light produces defined shadows and stronger facial texture. It suits suspense, documentary realism, and stylized looks.
- Soft key light wraps around the face and reduces visible skin texture. It suits beauty, corporate interviews, and most controlled dialogue scenes.
- Soft fill is usually preferred because the fill is meant to reduce contrast, not add another dominant shadow pattern.
- Back light is often kept relatively hard or narrow so it can separate the subject cleanly.
The size of the source relative to the subject matters more than the fixture type itself. A small lamp placed close can behave like a soft source, while a large source moved far away can become harder.
Common Mistakes
- Overfilling the face. Too much fill removes shape and makes the image look flat.
- Putting the fill too far off axis. This creates a second shadow direction and makes the lighting feel confused.
- Letting the back light spill into frame. A visible fixture or flare can distract from the subject unless it is intentionally part of the design.
- Ignoring background contrast. A good subject setup can still fail if the background is equally bright and visually cluttered.
- Matching all three lights in strength. The setup becomes lifeless when every source has the same value.
Why It Works
This setup creates modeling (depth on the face), controls shadow contrast, and separates the subject from the background, making footage look polished and professional. 3, 2 It is also fast to repeat, which is why it remains a standard approach on interviews, talking-head videos, narrative coverage, and controlled studio scenes.
Three-point lighting is not a law; it is a language. Once the relationship between key, fill, and back light is understood, the same structure can be pushed toward naturalism, drama, glamour, or graphic contrast without losing clarity.
Quick FAQ
Is three-point lighting always necessary?
No. One light, window light, practicals, or negative fill can be enough when the scene calls for a simpler or more natural look.
Can the back light be skipped?
Yes. In very soft or minimal setups, background separation may come from a brighter backdrop, rim spill, or reflected ambient light instead of a dedicated back light.
Does the fill have to be a light?
No. Reflectors, bounce cards, white walls, or even a bright floor can serve as fill if they are placed close to the camera axis and controlled carefully.
Can the same setup work for low-key lighting?
Yes. The key is usually preserved, while the fill is reduced or removed and the back light is used selectively to keep the subject from disappearing into shadow.
References
-
Three Point Lighting - The Best Lighting Setup for Youtube Videos | Film Lighting Techniques
-
How To Set Up 3-Point Lighting for Film, Video and Photography