Mastering Colour Grading with LUTs: A Comprehensive Guide for Filmmakers
Image source: Master Cinematic Colour Grading with LUTs - Paul Handley Colourist

Image source: LUTs Explained | Types of LUTs | Lecture 34 | Colour Grading Tutorial

Image source: What is a LUT? Using LUTs to Color Grade PHOTOS & VIDEOS
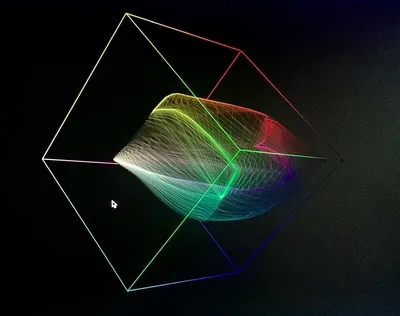
A LUT (Look-Up Table) is a mathematically precise file that remaps the color values in your footage to new RGB values, acting like a color-grade preset or “spreadsheet” that tells every possible input color what it should look like output. In colour grading, you use LUTs either to convert flat Log footage to a standard display space (technical) or to impose a stylized cinematic look (creative). 1, 2, 3
Two main types of LUTs
| Type | Purpose | Common use case |
|---|---|---|
| Technical LUT | Transforms one color space/gamut to another | Convert Sony Log/Canon Log → Rec.709 or DCI-P3 for accurate viewing 2, 3 |
| Creative LUT | Adds a specific aesthetic look | Film-stock emulation, high-contrast “bleach bypass,” teal-or-orange style 1, 2 |
*Left: desaturated Log profile; Right: same footage after applying a Log→Rec.709 technical LUT *
How to use LUTs in your colour-grading workflow
-
Start with proper exposure and colour correction
LUTs are not a magic wand—apply them after you’ve balanced exposure, white balance, and contrast on each shot. 3, 4 -
Place technical LUTs early (or at the end)
-
Add creative LUTs as a starting look
-
Tune per shot
A single LUT will never look perfect on every shot—adjust exposure, saturation, and hue individually after the LUT is applied. 2, 7 -
Use in your editing/grading software
Common tools: DaVinci Resolve, Adobe Premiere Pro, Final Cut Pro, Photoshop (for photos). 8, 1, 6- In Resolve: go to the Color page → LUT panel → import & apply to a node.
- In Premiere: Effect Controls → Color → LUT dropdown → Import Custom LUT.
*Resolve interface showing the LUT panel, color wheels, and waveforms *
Key limitations to remember
- One LUT ≠ all shots: different lighting, cameras, and exposure require individual adjustments. 2
- Don’t over-rely: LUTs save time and ensure consistency, but professional grading still needs manual tweaking. 7, 3
- Quality matters: cheap bulk LUT packs often produce poor color; prefer LUTs from trusted professionals. 5
Do you want a step-by-step for applying LUTs in a specific software (e.g., DaVinci Resolve, Premiere Pro, or Final Cut)?
References
-
What is a LUT (and how do you use a LUT for color correction)?
-
LUTS IN COLOUR GRADING #mastering #creativecolorgrading #cinematography #davinciresolve19
-
Master Cinematic Colour Grading with LUTs - Paul Handley Colourist
-
LUTs Explained | Types of LUTs | Lecture 34 | Colour Grading Tutorial
-
Can someone explain what a “LUT” is and how to use them properly?
-
What is a LUT? | A Beginner’s Guide to Color Grading with LUTs