Mastering the Two-Shot: Key Techniques for Captivating Dialogue
Image source: Pre preliminary task
Image source: How to SHOOT a dialogue scene!!
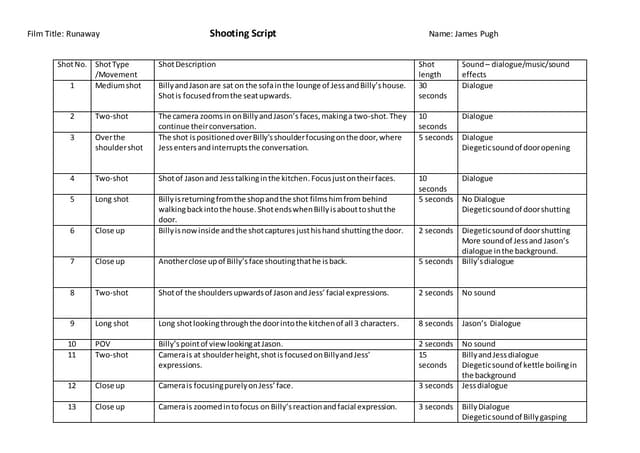
Image source: Shooting script (1)
To shoot a two-shot for dialogue, frame both actors in a single shot (traditionally waist-up), position them so the camera doesn’t cross the 180° axis line between them, and use the composition to emphasize the scene’s emotional core.
Key steps and setup
1. Define what a two-shot is
- A two-shot is any frame that includes two subjects, most commonly framed medium (waist up) for dialogue. 1, 2
- It shows interaction, body language, and emotional reactions between both characters at the same time. 2
2. Choose the actors’ positions
Common configurations:
| Configuration | When to use | Visual effect |
|---|---|---|
| Face-to-face (slight angle) | Conflict, intense conversation | Clear eye contact, tension |
| Side-by-side | Collaboration, intimacy, shared focus | Unity, partnership |
| One slightly behind | Power imbalance, mentorship | Depth, hierarchy |
Make sure:
- Both faces are visible and well-lit.
- Their heights and positions create a clean, readable composition (not one head blocking the other).
3. Apply the 180° rule (don’t cross the axis)
- Imagine an axis line between the two actors.
- Keep the camera on one side of that line for all shots in the scene. 3, 4
- If Actor A’s iso faces right and Actor B’s iso faces left, they’re clearly facing each other; crossing the axis flips this and confuses the audience. 3
4. Decide camera angle, distance, and movement
- Angle:
- Slight high angle can soften or make characters look vulnerable.
- Slight low angle can add power or drama.
- Mostly eye-level for natural, realistic dialogue. 1
- Distance:
- Movement:
- Static: focuses on performance and dialogue.
- Slow push-in: increases tension or emotional weight.
- Gentle pan/tracking: follows small movements while keeping both in frame. 1
All camera choices should support the story and let the actors’ performances shine. 1
5. Use the two-shot in context with other coverage
For a complete dialogue scene, you typically want:
- Master two-shot (wide): establishes the room and positions. 6, 3
- Over-the-shoulder (OTS) shots for each actor.
- Isolated singles (iso) for emphasis and reaction.
- Reaction shots and inserts (hands, objects) to vary visuals and smooth cuts. 3
Common workflow:
- Start with the master two-shot to establish the scene.
- Shoot all coverage for one actor (OTS, close-up, reverses).
- Flip everything and shoot the other actor’s coverage with the same lens, distance, and aperture to match. 6
- Add inserts and extra reaction shots over dialogue. 6, 3
6. Frame the composition around the scene’s purpose
Ask: is the scene about:
- Collaboration → side-by-side or slightly angled, closer two-shot.
- Conflict → face-to-face, maybe with a wider angle to emphasize distance. 5
- Comedic beat → clear eyelines, well-timed movement, maybe a static two-shot to catch the whole exchange. 1
The composition should emphasize the essence of the interaction. 1
7. Practical shooting tips
- Do extra takes of the wide/master two-shot even if the scene is nailed early; you’ll likely need it in editing. 7
- Keep continuity consistent: liquid levels, food, props, and actor positions between takes. 3
- If lighting close-ups tightly, be careful that lights don’t show in the wide two-shot; plan light placement accordingly. 6
- Consider using two cameras for the two-shot and OTS angles if lighting is controlled, to save time and capture natural reactions. 4
If you tell me your situation (e.g., “two people sitting at a table arguing” vs. “two friends walking and talking”), I can suggest a specific blocking and camera setup for that exact scenario.